| Assembly |
Mounting the Power Supply
Since I got a separate case and power supply, I needed to mount the power supply in the case. This should be extremely easy, even for a clumsy fool like myself.
I managed to have some problems. First of all, the amount of cables that comes out of the power supply is quite intimidating. A bit of work to get them all inside the case neatly. I guess I'll have to figure out which goes where. Should be idiot-proof, though. Oh well, I'll worry about that later.
The case has a bracket that should be screwed onto the power supply. Much to my dismay, I found out that the holes on the bracket do not line up with those on the power supply. What the #$%^^%#??? This is all name brand stuff (the case and power supply), how can this possibly be??
Turns out I had tried to mount the power supply upside down. After correcting this, the screw holes lined up just fine.
Well, almost. They did not line up perfectly. Rather than trying to force the screws in, I decided to attach the mounting bracket to the power supply quite loosely. Then I put bracket and power supply into the case, again with the screws rather loose. Eight screws to tighten now. Just go one by one, quite gently, and whaddaya know? It all settles and aligns quite well. Success! If we ignore the bonehead mistake of trying to mount it upside down, of course.
Motherboard And All That
After the tiring experience with the power supply, I decided to try something that should be even simpler: screwing the motherboard standoffs in.
I forgot to mention that the case has a so-called removable
motherboard tray. This is basically just a huge piece of metal
(aluminum) that has various holes on it. Basically the idea is
that you can mount your motherboard on this tray, do all you need
to the motherboard, and when you're done put the tray with
motherboard and all back in the case.
Boy, is this a good idea!
For someone who's all thumbs like me, this makes life so much
easier!
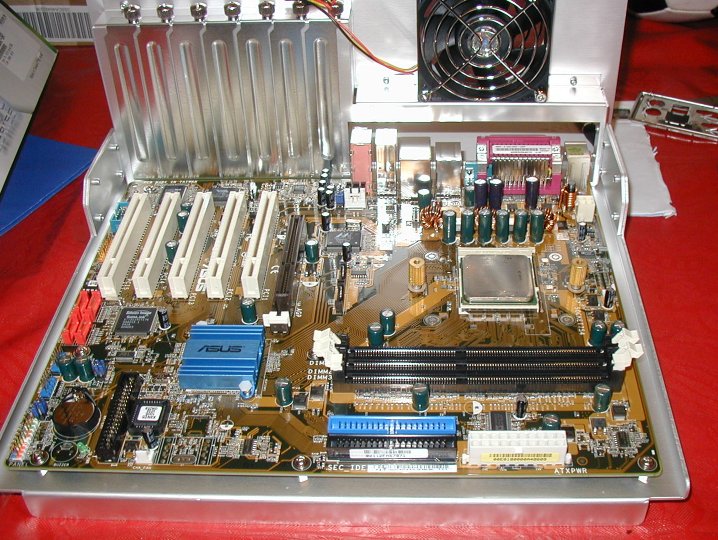
Motherboard mounted in tray.
Anyway, I had already done something else to the motherboard.
The Zalman cooler I got required a few special steps.
First, I
needed to remove the retention frame from the motherboard. What
the heck is that? Well, it's just a piece of black plastic that
sits on the motherboard around the processor socket. It is meant
to keep the processor cooler in place. Since I had a non-standard
cooler, the manual said that the retention frame was not needed
for a Socket 754 processor. Boy, they weren't kidding. You must
remove the retention frame, or else nothing wil fit.
Removing it
was easy enough. Just unscrew two screws and the whole thing
comes off.
Next, I had to put a backplate on the back of the
motherboard and secure it with two brass standoffs. Only problem
was that the motherboard already has a backplate. Good thing it
looked identical to the backplate that comes with the cooler. No
sense in replacing it, so I just put the two brass standoffs in.
What's a standoff anyway? It's male/female screw, basically. One end goes into a screw hole, and the top will take another screw. That's basically the best I can do describing it...
So, I finally decided to put the standoffs on the motherboard tray. The case manual said to put in 8 of these puppies. My motherboard has 9 holes though. So I put in 9, since the case comes with no fewer than 24 of these things. Finding the right spots was something even I could do right the first time. Easy enough.
Next, I decided to do something I had been putting off: putting the processor in it's socket and mounting the cooler. I was a little anxious about this, since the processor is quite expensive. Has to be done though.
Putting the processor in was actually a piece of cake. It is
not possible to put it in the wrong way (unless you are Tarzan
and force it in wrong. This will bend the processor pins and ruin
the thing).
As instructed, I lifted the socket locking lever, put
the processor in the right way, and gently pushed the processor
into the socket (I did check for bent pins before I did this. All
were straight as an arrow). Close the locking lever, and Bob's
your uncle.
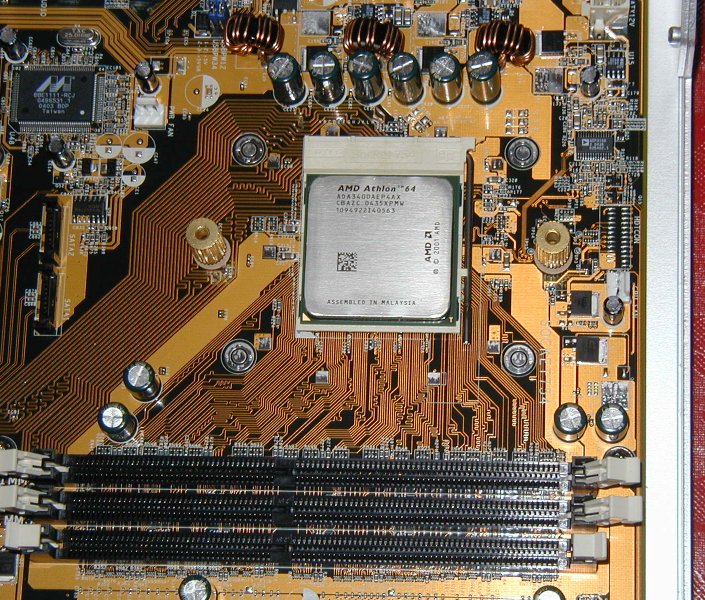
Processor in socket. Notice the two brass standoffs for mounting the cooler.
The unexpected success of this operation gave me courage. At least the processor was safely in its socket now, which greatly reduced the risk of damaging it with Electrostatic Discharge (electrical engineering mumbo jumbo).
While I was at it, I decided to apply the 'thermal grease' to the processor. Since I had bought the supposedly superior Arctic Silver 5 thermal compound, I did not use the thermal grease that came with the cooler. Apply a little of the stuff to the top of the processor, and smear it out with a piece of flat plastic. An expired credit card works quite well for this. I did not use enough of the stuff to cover the whole processor, so add a little more. Keep working with the credit card until the processor is evenly covered with a thin layer of the stuff.
One would think that more is better. Not so. You need to apply just enough so that the whole processor is covered, but the layer needs to be as thin as possible to maximize thermal conductivity.
Next step was to put the cooler on top of the processor. Good
thing I did this right the first time (you can't put it on wrong
actually, unless you are really, really stupid). The Arctic
Silver is quite sticky, actually. It's not glue, but still.
Anyway, attach the cooler (Zalman has an animation on their
website that is quite helpful), and fasten the screws as
instructed. I was afraid it would be hard to determine how
tightly to fasten them (not tight enough and it will not cool too
well, too tight and you might break something), but that turned
out not to be the case. I could feel quite clearly when the
screws were just tight enough.
Last step was to connect the
cooler connector to the right pins on the motherboard. Easy
enough, it was marked clearly on the motherboard and you can only
connect it in one way.
Since I was on a roll, I decided to put the memory in as well. I had actually done this before. Can't put them in wrong, just don't play Tarzan when the memory modules don't go in the first time.
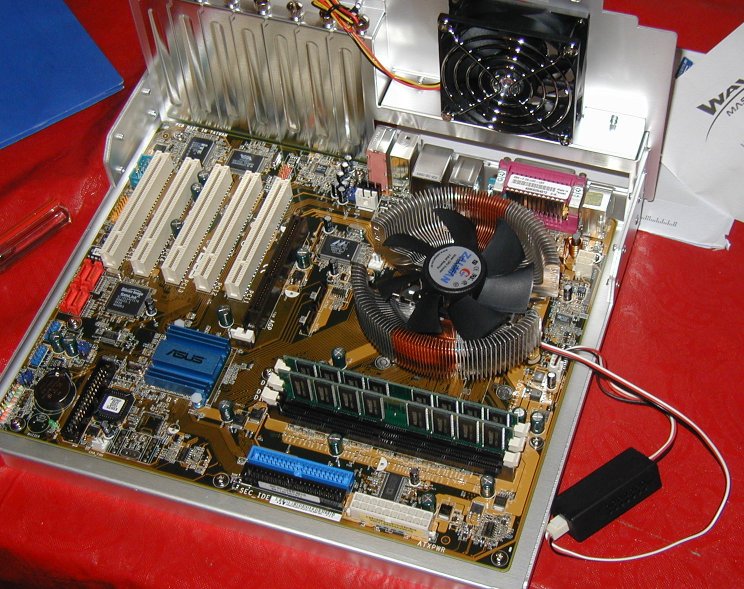
Cooler and memory installed. Notice the monstrous size of the cooler.
I decided not to push my luck and continue the next day. Put motherboard tray in the case so the kids won't spill juice on it, and put away all the tools. One screwdriver, that is.
You can send me email at henkjan@oldeloohuis.com
Please send comments to webmaster@oldeloohuis.com.